
Do you know that little sticker on your windshield that reminds you when it’s time for an oil change? Yeah, that one. It’s like a nagging parent telling you to clean your room – except in this case, it’s your car that needs some TLC. But here’s the kicker: instead of shelling out cash at the dealership or a quick lube joint, why not roll up your sleeves and do it yourself? Changing your car’s oil isn’t just satisfying; it’s a money-saver too.
In this article, we’re going to dive into the nitty-gritty of DIY oil changes. We’ll explore why it’s a smart move, and how much you can save, and walk through the step-by-step process. So, grab your wrenches and get ready to get greasy – it’s time to take control of your car’s maintenance.
Key Takeaways
- Changing your oil is a cost-effective way to maintain your vehicle and can save you hundreds of dollars each year.
- It allows you to inspect your car’s components, ensuring everything is in good working order.
- With the right tools and a little elbow grease, a DIY oil change is a straightforward process that most car owners can handle.
- Proper disposal of used oil is crucial to protect the environment and comply with local regulations.
Can I Change My Car Oil at Home?
You bet your dipstick you can! Changing your oil isn’t rocket science, and it comes with some serious perks:
- Cost Savings: Let’s face it; professional oil changes can put a dent in your wallet. By doing it yourself, you’ll save a bundle on labor costs. Plus, you can often snag discounted oil and filters at your local auto parts store or online.
- Convenience: No more waiting in line at the quick lube joint or dealing with their limited hours. With a DIY oil change, you can do it on your schedule – whether that’s a lazy Sunday afternoon or a weeknight after work.
- Inspection Advantage: When you’re the one getting down and dirty, you can take a closer look at your car’s components. This allows you to spot any potential issues before they become bigger (and more expensive) problems.
Now, before you rush off to grab your tools, there are a few things to consider. Make sure you have the necessary equipment, like an oil drain pan, wrenches, and the proper oil and filter for your vehicle. You’ll also need to plan for the safe disposal of the used oil – more on that later.
Oh, and let’s not forget about safety. Working under a car can be risky, so make sure you’ve got a solid jack and jack stands to keep things secure.
Is It Cheaper to Do an Oil Change Yourself?
In short, absolutely! Let’s break down the numbers:
| Cost | DIY Oil Change | Professional Service |
|---|---|---|
| Oil Filter | $5 – $10 | Included |
| Oil (5 quarts) | $15 – $30 | Included |
| Labor | Free (priceless, really) | $20 – $40 |
| Total Cost | $20 – $40 | $40 – $70 |
As you can see, doing it yourself can save you a pretty penny – we’re talking $20 to $50 per oil change! And if you’re the type to stick to your maintenance schedule (which you should be), those savings can add up over time.
But the benefits go beyond just the upfront costs. By changing your oil, you’re extending the life of your vehicle and potentially avoiding costly repairs down the road. It’s like that old saying goes: “An ounce of prevention is worth a pound of cure.” Except in this case, it’s more like “A few bucks and some elbow grease can save you thousands in repair bills.”
How to Change Oil in Car Step-by-Step
Alright, folks, it’s time to get down to brass tacks. Here’s a step-by-step guide on how to change your car’s oil like a pro:
1. Gather Your Gear
- Oil drain pan
- Wrenches and sockets (check your owner’s manual for the right sizes)
- New oil filter
- Fresh engine oil (consult your manual for the recommended type and quantity)
2. Prep Your Ride
- Park your car on a level surface and engage the parking brake.
- Let the engine cool down completely – you don’t want to risk burning yourself on hot components.
3. Drain the Old Oil
- Locate the oil drain plug, usually found underneath the car near the oil pan.
- Position the drain pan beneath the plug, then loosen it with your wrench or socket.
- Let the old oil drain out completely. This might take a little while, so be patient.
4. Swap Out the Filter
- Locate the oil filter, which is typically easily accessible from the top or side of the engine.
- Use your filter wrench to loosen and remove the old filter. You might need to give it a good tug to break the seal.
- Before installing the new filter, apply a thin coat of fresh oil to the gasket. This will help ensure a proper seal.
- Screw on the new filter by hand until it’s snug – no need to crank it down too tight.
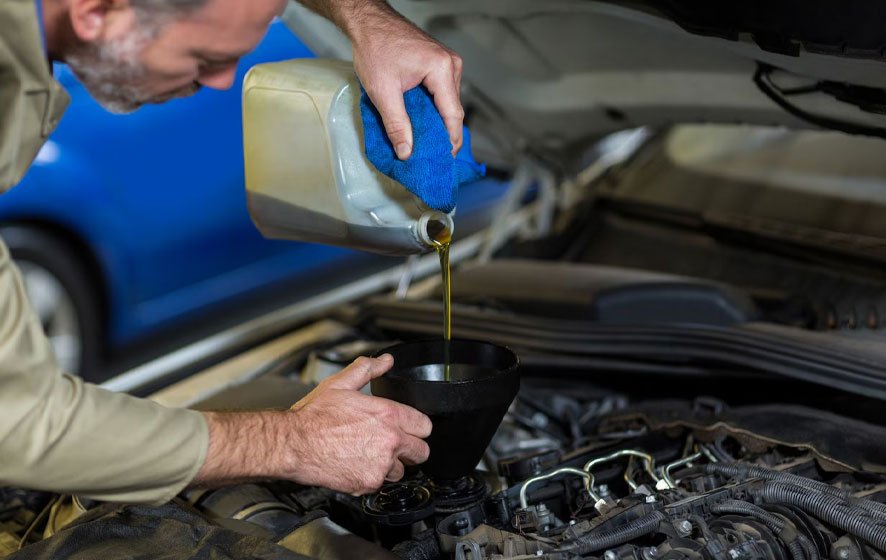
5. Top ‘Er Off
- Once the old oil has drained out, replace the drain plug and tighten it securely.
- Locate the oil fill port, usually marked with a cap or symbol on the engine.
- Slowly pour in the fresh oil, keeping an eye on the dipstick to avoid overfilling.
- Make sure to fill it to the proper level, as indicated in your owner’s manual.
6. Properly Dispose of Used Oil
- Used motor oil is considered a household hazardous waste, so you can’t just dump it down the drain or toss it in the trash.
- Check with your local auto parts store or municipal recycling center for proper disposal methods and locations.
- Some areas even offer curbside pickup for used oil – how’s that for convenience?
7. Inspect and Start ‘Er Up
- Before firing up the engine, take a quick look around the oil filter and drain plug to ensure there are no leaks.
- Start the engine and let it run for a minute or two.
- Shut it off, wait a few minutes, then check the dipstick one last time. Top up if necessary.
And just like that, you’ve successfully changed your car’s oil! Give yourself a pat on the back, grab a cold one, and bask in the glory of your hard-earned savings.
Conclusion
Listen, changing your oil might not be as glamorous as installing a new exhaust system or tinting your windows, but it’s a crucial part of maintaining your ride. Not only does it save you money, but it also gives you a chance to get up close and personal with your vehicle – and who doesn’t love a little quality time with their four-wheeled baby?
So, the next time that little sticker starts nagging you, don’t just blindly hand over your hard-earned cash. Embrace your inner grease monkey, grab your tools, and get your hands dirty. Your wallet (and your car) will thank you.
And if you ever find yourself in over your head or need a little extra guidance, don’t be afraid to reach out to your local auto parts store or trusted mechanic. They’re usually more than happy to lend a hand and share their expertise with fellow DIYers.
At the end of the day, changing your oil is all about taking control of your car’s maintenance and saving some dough in the process. So, what are you waiting for? It’s time to get those wrenches turning!